

 Proudly American
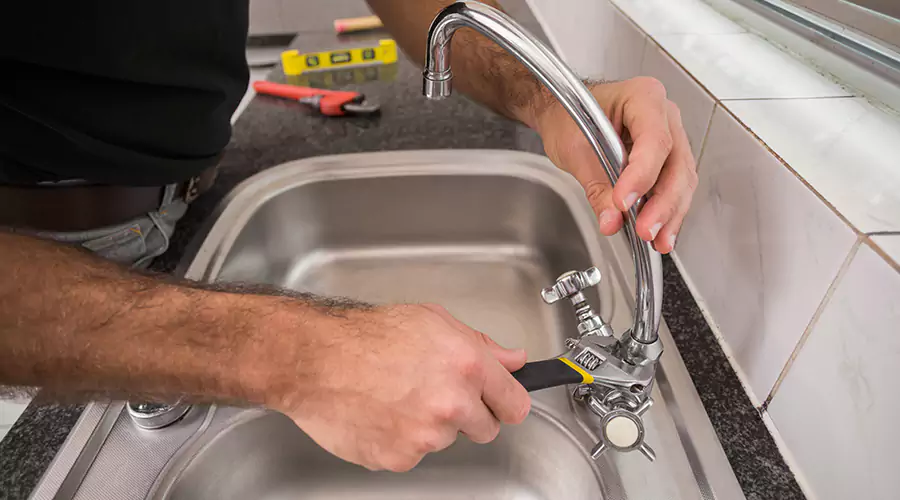
Installing a kitchen faucet is a manageable DIY project if you take your time and follow the right order. Most faucet installs take 1 to 2 hours, and the biggest challenges are usually tight spaces under the sink and old fittings that do not want to move. This guide covers how to remove the old faucet, install the new one, connect the water lines, and test for leaks.
Before You Start: What to Check?
Confirm faucet compatibility
Before opening tools, make sure your new faucet matches your sink setup.
- Mounting holes: One hole (single handle) or three holes (widespread or with a deck plate)
- Faucet height and reach: Make sure it fits under cabinets and over the sink basin
- Supply line connections: Most homes use 3/8 inch compression shutoff valves
Clear the workspace
Remove everything under the sink. Place a towel down and keep a bucket nearby for drips.
Tools and Materials You Need
Tools
- Adjustable wrench or two
- Basin wrench (highly recommended for tight spaces)
- Screwdriver
- Flashlight or headlamp
- Utility knife (for old sealant)
Materials
- New kitchen faucet kit (faucet, gasket or deck plate, mounting hardware)
- New supply lines if needed (recommended if old ones are worn)
- Plumber’s tape for threaded connections if the instructions call for it
- Rag and mild cleaner
Step by Step: How to Install a Kitchen Faucet?
Step 1: Shut off the water
Turn off the hot and cold shutoff valves under the sink by turning them clockwise. Then open the faucet to relieve pressure.
Tip: If the shutoff valves are stuck or leaking when turned, stop and address the valves first.
Step 2: Disconnect the supply lines
Place a bucket under the valves. Use a wrench to loosen the nuts connecting the supply lines to the shutoff valves.
- Expect a little water to drain out
- Set the lines aside
If your faucet has a pull down sprayer, disconnect the hose connection too.
Step 3: Remove the old faucet
Under the sink, locate the mounting nuts holding the faucet in place. These can be hard to reach.
Best method
- Use a basin wrench to loosen the mounting nuts
- Turn counterclockwise to remove
If the nuts are corroded, apply a penetrating lubricant and wait a few minutes. In worst cases, you may need to cut away old hardware carefully, but avoid damaging the sink.
Once the mounting hardware is off, lift the old faucet out from above.
Step 4: Clean the sink surface
Scrape off old putty, sealant, or grime around the faucet holes. Wipe the area clean and dry.
A clean surface helps the gasket seal properly and prevents leaks under the faucet base.
Step 5: Install the gasket or deck plate
Your faucet will include one of these:
- Rubber or foam gasket: Sits under the faucet base
- Deck plate: Covers extra holes on three hole sinks
Follow the faucet instructions. Many modern faucets use a gasket and do not require plumber’s putty. If the manual says to use silicone, apply a thin bead where instructed.
Step 6: Set the new faucet in place
Feed the faucet lines down through the sink hole. Align the faucet so it sits straight and centered.
If there is a deck plate, make sure it is aligned before tightening anything underneath.
Step 7: Secure the mounting hardware
From under the sink, install the mounting bracket and nuts.
- Hand tighten first so you can adjust alignment
- Check faucet position from above
- Tighten evenly until snug
Do not overtighten. You want the faucet stable, not crushed against the sink.
Step 8: Connect the supply lines
Attach the hot and cold supply lines to the shutoff valves.
- Hot is usually on the left
- Cold is usually on the right
Hand tighten the nuts, then tighten with a wrench another small amount. Avoid forcing. Over tightening can damage washers and cause leaks.
If your faucet includes pre attached supply lines, connect those. If not, install new braided stainless supply lines for reliability.
Step 9: Connect the sprayer hose and weight
If you have a pull down faucet:
- Connect the sprayer hose to the faucet outlet as directed
- Install the hose weight at the distance recommended by the manufacturer so the hose retracts smoothly
Step 10: Flush and test for leaks
This step prevents debris from clogging the aerator.
- Remove the faucet aerator if possible.
- Turn on the shutoff valves slowly.
- Open the faucet and let water run for 1 to 2 minutes.
- Check all connections under the sink for drips.
- Turn water off, reinstall the aerator, then test again.
Common Problems and Quick Fixes
Leak at the shutoff valve connection
- Tighten the nut slightly
- If it still leaks, the washer may be damaged or the valve may be worn
Leak where the supply line connects to the faucet
- Verify the connection is seated correctly
- Tighten gently
- Check if plumber’s tape is required by the manufacturer for that fitting
Faucet feels loose
- Tighten the mounting nuts evenly
- Confirm the bracket is positioned correctly against the underside of the sink
Low flow after install
- Remove and clean the aerator
- Flush the lines again
- Check for kinked hoses
Final Tips for a Clean, Professional Install
- Take a photo before disconnecting the old faucet, it helps with reconnection
- Replace old supply lines if they show rust, kinks, or stiffness
- Turn valves on slowly to prevent sudden pressure shocks
- Keep a towel under the sink for the first day to catch small drips early
FAQ
Do I need plumber’s putty to install a kitchen faucet?
Many modern faucets use a gasket and do not need putty. Follow the manufacturer instructions. Use silicone only if the manual calls for it.
How long does it take to install a kitchen faucet?
Most installs take 1 to 2 hours, depending on access under the sink and how corroded the old hardware is.
Final Takeaway
To install a kitchen faucet, shut off water, remove the old faucet, clean the sink, set the new faucet with a gasket or deck plate, tighten the mounting hardware, reconnect the supply lines, then flush and leak test. With careful tightening and a proper final check, your new faucet should be solid, leak free, and ready for daily use.